Contributing
Prerequisites
In order to contribute to Meltano, you will need the following:
Where to start?
We welcome contributions, idea submissions, and improvements. In fact we may already have open issues labeled Accepting Merge Requests if you don't know where to start. Please see the contribution guidelines below for source code related contributions.
# Clone the Meltano repo
git clone git@gitlab.com:meltano/meltano.git

# Change directory into the Meltano project
cd meltano

# Optional, but it's best to have the latest pip
pip3 install --upgrade pip

# Optional, but it's best to have the latest setuptools
pip3 install --upgrade setuptools

# Optional, but it's recommended to create a virtual environment
# in order to minimize side effects from unknown environment variable
python -m venv ~/.venv/meltano-development

# Activate your virtual environment
source ~/.venv/meltano-development/bin/activate

# Install all the dependencies
pip3 install -r requirements.txt

# Install dev dependencies with the edit flag on to detect changes
# Note: you may have to escape the .`[dev]` argument on some shells, like zsh
pip3 install -e .[dev]

# Bundle the Meltano UI into the `meltano` package
make bundle
Meltano is now installed and available at meltano, as long as you remain in your meltano-development virtual environment!
This means that you're ready to start Meltano CLI development. For API and UI development, read on.
Metrics (anonymous usage data) tracking
As you contribute to Meltano, you may want to disable metrics tracking globally rather than by project. You can do this by setting the environment variable MELTANO_DISABLE_TRACKING to True:
# Add to `~/.bashrc`, `~/.zshrc`, etc, depending on the shell you use:
export MELTANO_DISABLE_TRACKING=True
API Development
For all changes that do not involve working on Meltano UI (front-end) itself, run the following command:
# Starts both a development build of the Meltano API and a production build of Meltano UI
FLASK_ENV=development meltano ui
The development build of the Meltano API should be available at http://localhost:5000/.
Troubleshooting
If you run into /bin/sh: yarn: command not found, double check that you've got the prerequisites installed.
On macOS, this can be solved by running brew install yarn.
UI Development
In the event you are contributing to Meltano UI and want to work with all of the frontend tooling (i.e., hot module reloading, etc.), you will need to run the following commands:
# Navigate to a Meltano project that has already been initialized
# Start the Meltano API and a production build of Meltano UI that you can ignore
meltano ui

# Open a new terminal tab and go to your meltano directory
# Install frontend infrastructure at the root directory
yarn setup

# Start local development environment
yarn serve
The development build of the Meltano UI will be available at http://localhost:8080/.
If you need to change the URL of your development environment, you can do this by updating your .env in your project directory with the following configuration:
# The URL where the web app will be located when working locally in development
# since it provides the redirect after authentication.
# Not require for production
export MELTANO_UI_URL = ""
Taps & Targets Development
Watch "How taps are built" for an explanation of how Singer taps (which form the basis for Meltano extractors) work, and what goes into building new ones or verifying and modifying existing ones for various types of APIs.
Then watch "How transforms are built" for an explanation of how DBT transforms work, and what goes into building new ones for new data sources.
Changing discovery.yml
discovery.yml version
Whenever new functionality is introduced that changes the schema of discovery.yml (the exact properties it supports and their types), the version in src/meltano/core/bundle/discovery.yml and the VERSION constant in src/meltano/core/plugin_discovery_service.py must be incremented, so that older instances of Meltano don't attempt to download and parse a discovery.yml its parser is not compatible with.
Changes to discovery.yml that only use existing properties do not constitute schema changes and do not require version to be incremented.
Local changes to discovery.yml
When you need to make changes to discovery.yml, these changes are not automatically detected inside of the meltano repo during development. While there are a few ways to solve this problem, it is recommended to create a symbolic link in order ensure that changes made inside of the meltano repo appear inside the Meltano project you initialized and are testing on.
- Get path for
discovery.ymlin the repo
- Example:
/Users/bencodezen/Projects/meltano/src/meltano/core/bundle/discovery.yml
Open your Meltano project in your terminal
Create a symbolic link by running the following command:
ln -s $YOUR_DISCOVERY_YML_PATH
Now, when you run the ls -l command, you should see something like:
bencodezen staff 72 Nov 19 09:19 discovery.yml -> /Users/bencodezen/Projects/meltano/src/meltano/core/bundle/discovery.yml
Now, you can see your changes in discovery.yml live in your project during development! 🎉
Connector settings
Each extractor (tap) and loader (target) in the discovery.yml has a settings property. Nested under this property are a variable amount of individual settings. In the Meltano UI these settings are parsed to generate a configuration form. To improve the UX of this form, each setting has a number of optional properties:
- settings:
    - name: setting_name # Required (must match the connector setting name)
      label: Setting Name # Optional (human friendly text display of the setting name)
      value: '' # Optional (Use to set a default value)
      placeholder: Ex. format_like_this # Optional (Use to set the input's placeholder default)
      kind: string # Optional (Use for a first-class input control. Default is `string`, others are `hidden`, `boolean`, `date_iso8601`, `password`, `options`, & `file`)
      description: Setting description # Optional (Use to provide inline context)
      tooltip: Here is some more info... # Optional (use to provide additional inline context)
      documentation: https://meltano.com/ # Optional (use to link to specific supplemental documentation)
      protected: true # Optional (use in combination with `value` to provide an uneditable default)
      env: SOME_API_KEY # Optional (use to delegate to an environment variable for overriding this setting's value)
For existing taps/targets
We should be good citizen about these, and use the default workflow to contribute. Most of these are on GitHub so:
- Fork (using Meltano organization)
- Add a webhook to trigger the
meltano/meltanopipeline. - Modify and submits PRs
- If there is resistance, fork as our tap (2)
For taps/targets we create
- For tap development please use the tap cookiecutter template.
- For target development please use the target cookiecutter template.
- Use a separate repo (meltano/target|tap-x) in GitLab e.g. Snowflake: https://gitlab.com/meltano/target-snowflake
- Add a webhook to trigger the
meltano/meltanopipeline. - Publish PyPI packages of these package (not for now)
- We could mirror this repo on GitHub if we want (not for now)
System Database
Meltano API and CLI are both supported by a database that is managed using Alembic migrations.
Note
Alembic is a full featured database migration working on top of SQLAlchemy.
Migrations for the system database are located inside the meltano.migrations module.
To create a new migration, use the alembic revision -m "message" command, then edit the created file with the necessary database changes. Make sure to implement both upgrade and downgrade, so the migration is reversible, as this will be used in migration tests in the future.
Each migration should be isolated from the meltano module, so don't import any model definition inside a migration.
WARNING
Meltano doesn't currently support auto-generating migration from the models definition.
To run the migrations, use meltano upgrade inside a Meltano project.
Documentation
Meltano uses VuePress to manage its documentation site. Some of the benefits it provides us includes:
- Enhanced Markdown authoring experience
- Automatic check for broken relative links
Text
Follow the Merge Requests and Changelog portions of this contribution section for text-based documentation contributions.
Images
When adding supporting visuals to documentation, adhere to:
- Use Chrome in "incognito mode" (we do this to have the same browser bar for consistency across screenshots)
- Screenshot the image at 16:9 aspect ratio with minimum 1280x720px
- Place
.pngscreenshot insrc/docs/.vuepress/public/screenshots/with a descriptive name
Testing
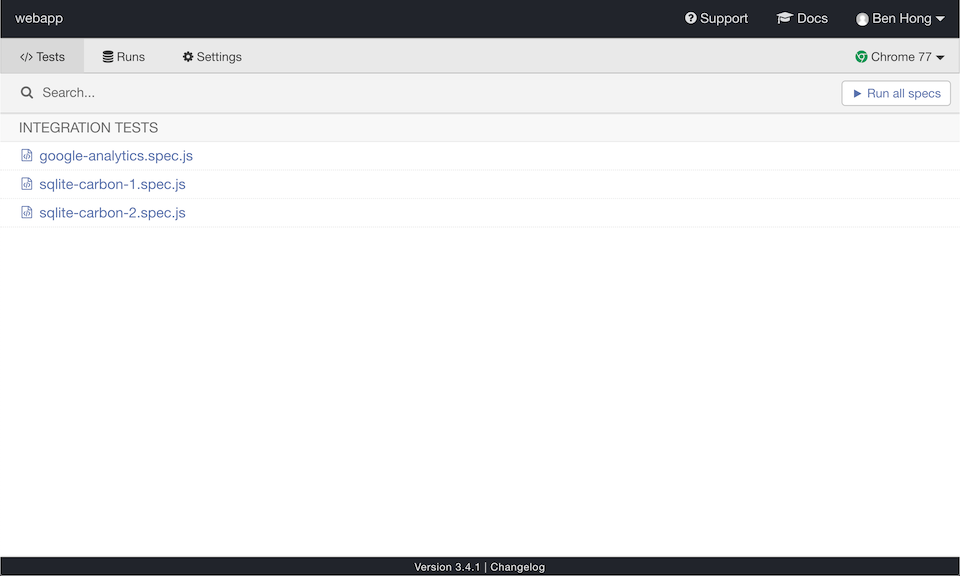
End-to-End Testing with Cypress
Our end-to-end tests are currently being built with Cypress.
How to Run Tests
- Initialize a new meltano project with
meltano init $PROJECT_NAME - Change directory into
$PROJECT_NAME - Start up project with
meltano ui - Clone Meltano repo
- Open Meltano repo in Terminal
- Run
yarn setup - Run
yarn test:e2e
This will kick off a Cypress application that will allow you to run tests as desired by clicking each test suite (which can be found in /src/tests/e2e/specs/*.spec.js)
In the near future, all tests can flow automatically; but there are some complications that require manual triggering due to an inability to read pipeline completion.
Code style
Tools
Meltano uses the below tools to enforce consistent code style. Explore the repo to learn of the specific rules and settings of each.
You may use make lint to automatically lint all your code, or make show_lint if you only want to see what needs to change.
Mantra
A contributor should know the exact line-of-code to make a change based on convention
In the spirit of GitLab's "boring solutions" with the above tools and mantra, the frontend codebase is additionally sorted as follows:
imports are alphabetical and subgrouped by core -> third-party -> application with a return delineating. For example:// core import Vue from 'vue' // third-party import lodash from 'lodash' // application import poller from '@/utils/poller' import utils from '@/utils/utils'object properties and methods are alphabetical where
Vuexstores are the exception (defaultState->getters->actions->mutations)
Over time we hope to automate the enforcement of the above sorting rules.
Troubleshooting
When testing your contributions you may need to ensure that your various __pycache__ directories are removed. This helps ensure that you are running the code you expect to be running.
UI/UX
Visual Hierarchy
Depth
The below level hierarchy defines the back to front depth sorting of UI elements. Use it as a mental model to inform your UI decisions.
- Level 1 - Primary navigation, sub-navigation, and signage - Grey
- Level 2 - Task container (traditionally the page metaphor) - White-ish Grey
- Level 3 - Primary task container(s) - White w/Shadow
- Level 4 - Dropdowns, dialogs, pop-overs, etc. - White w/Shadow
- Level 5 - Modals - White w/Lightbox
- Level 6 - Toasts - White w/Shadow + Message Color
Interactivity
Within each aforementioned depth level is an interactive color hierarchy that further organizes content while communicating an order of importance for interactive elements. This interactive color hierarchy subtly influences the user's attention and nudges their focus.
- Primary -
$interactive-primary- Core interactive elements (typically buttons) for achieving the primary task(s) in the UI
- Fill - Most important
- Stroke - Important
- Secondary -
$interactive-secondary- Supporting interactive elements (various controls) that assist the primary task(s) in the UI
- Fill - Most important
- Can be used for selected state (typically delegated to stroke) for grouped buttons (examples usage seen in Transform defaults)
- Stroke - Important
- Denotes the states of selected, active, and/or valid where grey represents the opposites unselected, inactive, and/or invalid
- Tertiary - Greyscale
- Typically white buttons and other useful controls that aren't core or are in support of the primary task(s) in the UI
- Navigation -
$interactive-navigation- Denotes navigation and sub-navigation interactive elements as distinct from primary and secondary task colors
After the primary, secondary, tertiary, or navigation decision is made, the button size decision is informed by:
- Use the default button size
- Use the
is-smallmodifier if it is within a component that can have multiple instances
Markup Hierarchy
There are three fundamental markup groups in the codebase. All three are technically VueJS single-file components but each have an intended use:
- Views (top-level "pages" and "page containers" that map to parent routes)
- Sub-views (nested "pages" of "page containers" that map to child routes)
- Components (widgets that are potentially reusable across parent and child routes)
Here is a technical breakdown:
- Views - navigation, signage, and sub-navigation
- Navigation and breadcrumbs are adjacent to the main view
- Use
<router-view-layout>as root with only one child for the main view:<div class="container view-body">- Can expand based on task real-estate requirements via
is-fluidclass addition
- Can expand based on task real-estate requirements via
- Reside in the
src/viewsdirectory
- Sub-views - tasks
- Use
<section>as root (naturally assumes a parent of<div class="container view-body">) with one type of child:- One or more
<div class="columns">each with their needed<div class="column">variations
- One or more
- Reside in feature directory (ex.
src/components/analyze/AnalyzeModels)
- Use
- Components - task helpers
- Use Vue component best practices
- Reside in feature or generic directory (ex.
src/components/analyze/ResultTableandsrc/components/generic/Dropdown)
Merge Requests
Searching for something to work on?
Start off by looking at our ~"Accepting Merge Requests" label.
Keep in mind that this is only a suggestion: all improvements are welcome.
Meltano uses an approval workflow for all merge requests.
- Create your merge request
- Assign the merge request to any Meltano maintainer for a review cycle
- Once the review is done the reviewer may approve the merge request or send it back for further iteration
- Once approved, the merge request can be merged by any Meltano maintainer
Reviews
A contributor can ask for a review on any merge request, without this merge request being done and/or ready to merge.
Asking for a review is asking for feedback on the implementation, not approval of the merge request. It is also the perfect time to familiarize yourself with the code base. If you don’t understand why a certain code path would solve a particular problem, that should be sent as feedback: it most probably means the code is cryptic/complex or that the problem is bigger than anticipated.
Merge conflicts, failing tests and/or missing checkboxes should not be used as ground for sending back a merge request without feedback, unless specified by the reviewer.
Changelog
Meltano uses changelog-cli to populate the CHANGELOG.md
Script
Use changelog (new|change|fix|breaks) MESSAGE to describe your current work in progress.
$ changelog new "add an amazing feature"
$ git add CHANGELOG.md
Make sure to add CHANGELOG entries to your merge requests.
Tmuxinator
Tmuxinator is a way for you to efficiently manage multiple services when starting up Meltano.
Why Tmuxinator?
In order to run applications, you need to run multiple sessions and have to do a lot of repetitive tasks (like sourcing your virtual environments). So we have created a way for you to start and track everything in its appropriate panes with a single command.
- Start up Docker
- Start Meltano API
- Start the web app
It's a game changer for development and it's worth the effort!
Requirements
- tmux - Recommended to install with brew
- tmuxinator
This config uses $MELTANO_VENV to source the virtual environment from. Set it to the correct directory before running tmuxinator.
Instructions
- Make sure you know what directory your virtual environment is. It is normally
.venvby default. - Run the following commands. Keep in mind that the
.venvin line 2 refers to your virtual environment directory in Step #1.
cd path/to/meltano
MELTANO_VENV=.venv tmuxinator local